How to burn files to disk? Writing prepared files to disk in Windows OS How to write information to disk from a computer
In everyday practice with a computer, sooner or later you will have to face the question: how to write files to disk. For example, I'll show you how to burn a disc on Windows 7 and Windows XP. This process is quite simple, but in some cases it requires specialized knowledge. I’ll try to tell you simply and clearly about the process of recording to disk and its intricacies.
Today I will teach you how to burn various files and folders from your computer onto regular blank CDs and DVDs. We will also talk to you about what types of disks there are and how they differ from each other.
Let me note right away that there is a way to write information to discs that does not involve the use of any writing program. This method is good for its versatility. With its help, you can write information to a blank disk without additional special programs and settings, on virtually any computer.
You can also write data to disk using the CDBurnerXP program; you can read a lesson on how to use it in my lesson “”.
Unfortunately, this method has one very serious drawback - on computers with the Windows operating system, this method can only write information to a CD. To burn DVD discs, you still need to install a special program (Nero or similar). In this case, it will not be possible to record information on a DVD disc; taking this fact into account, we will talk about this method in my further lessons.
What kind of discs are there?
Discs (optical storage media) are divided into CDs and DVDs, these are plastic discs with a hole in the center. Using a laser, information is recorded and read on them. Many people mistakenly believe that only cartoons and feature films can be recorded on DVD discs, and everything else can be recorded on CD discs: text documents, photographs, music. Of course, in reality this is not the case at all. CD and DVD discs differ mainly in the maximum size of recorded information.
Typically, a DVD disc contains five and sometimes eight times more information than a conventional CD disc. Thus, if a CD can fit one film, not recorded in the highest quality, then an ordinary DVD disc can contain three, four (and even more) films, depending on their size and quality. Nowadays it is very popular to sell licensed films on DVD discs. It is also possible to burn documents, music, photographs and other files to both a DVD and a CD.
The discs are also marked: RW and R. The difference between these discs is that on a disc with R it is possible to record information only once. Information can be written to a disk with RW not just once, but many times. On such disks, information can be recorded, used, and then erased (if necessary) and recorded with something else. Discs that can be recorded many times are called multisession discs.

Now we will look in detail at two ways to burn to a blank CD: for Windows 7 and for Windows XP.
How to Burn Discs in Windows XP
Before I start telling you how to burn a disc on Windows 7, I'll first show you how to do it in Windows XP. First, you need to insert a blank CD into your computer's drive. Now you need to select the files and folders that you want to burn to a blank CD. To do this, copy them by right-clicking on the files that need to be written.

After this, you need to open the drive, “My Computer” (Start -> Computer). In it, open the CD/DVD drive. You need to right-click on an empty space and click on “Paste”.
The folders and files that were copied will appear on the disk. This does not mean that files and folders have already been written to this empty disk. To burn these folders and files to a blank disk, you need to right-click on an empty space in the open window, and then select “Burn files and folders to a CD” from the list that appears.

The CD Burning Wizard window opens. Here you can type the chosen name for your disc in the CD Name field, although this is completely optional.

When your disc is burned (the green bar fills and then disappears), a new window will automatically open in which you need to click the “Done” button. After this, the recorded disc will pop out of the drive. With this, the computer tells us that the recording to your disk has been successfully completed, and you can already use this disk.
How to erase a disk in XP
From the above, you understand how to burn a disc on Windows XP. But if you recorded it on RW discs, you can use it several times. Let me remind you that it is possible to erase information from a disk if it is reusable (multi-session). Reusable discs are labeled RW. If your disk is written R (this means that it is disposable), then we will not be able to erase information from it for re-writing.
To do this, you must first insert your disc into the drive. Open the disk on your computer via “My Computer”. Open the CD/DVD drive in it. Then right-click on an empty space in the window. Select "Erase this CD-RW" from the list. In the new window that opens, click the “Next” button. Wait a moment until all previously recorded information on the disc is erased. The moment this happens, the “Done” button appears. Click on it. That's all. Your disk is now clean. You can record anything on it again.
Burning a disc in Windows 7
These instructions are intended for computer owners who want to understand how to write files to disk in the Windows 7 operating system.
Please note that computers with the Windows Vista and Windows 7 operating systems can record selected information both on a DVD and on a CD.
Select the folders and files that you want to burn to a blank disk. You need to copy them by right-clicking on any selected file or folder and selecting “Copy” from the list.  Then insert a blank disc into the drive. You need to open “Computer” (Start –> Computer). Open the CD/DVD drive. You need to double-click on its image with the left mouse button. A small window will open. Now you need to select the disk type. There are 2 types of disk available - “With a CD/DVD player” and “As a USB flash drive” (LFS file system).
  The first option – “With CD/DVD player” – is considered classic (as in Windows XP). It is quite suitable if you want to record music on your disc that you can listen to both on your computer and on your player. This option is not very convenient, but it is reliable - a disc recorded in this mode can be opened on any computer.
The second option is more convenient: you will have a disk similar to a flash drive. You will be able to record folders and files using regular copying. You can erase the disk by simply deleting it.
Select the disk type that suits you. Then click the "Next" button. If you selected the “Like a flash drive” type, you will see a warning about the need to wait until the disk is prepared for recording.  Now you need to click the “Yes” button. After the disk is prepared, the window will disappear and a new window will appear in which the computer will prompt you to open the folder to view the files.
 If such a window does not appear, you need to open “Computer” again, then “CD/DVD drive”. An empty disk will open. Right-click on an empty space, then click on “Paste”.
  After some time, all the folders and files you need will be added to the disk. The disc is recorded!
If the disc type is "With CD/DVD Player", a blank disc will open.
 Right-click on the free space, then click on “Paste”. Now the files and folders you copied will be pasted onto the disk. This does not mean that the information has already been written to the disk. To write these folders and files to an empty disk, right-click on the free space and select “Burn to disk” from the list.
  In the “Burn to disk” window that appears, you can type any name for your disk in the corresponding “Disk name” field, although this is not necessary. The “Write speed” field is needed to select at what speed the disc will be written, I usually write 16 x.
  Now click the "Next" button. You will have to wait a bit for the disc to burn. After the disc is written (the green bar is full and disappears), a new window will open, here you need to click the “Finish” button. Before closing a CD/DVD disc, you must end the session that was recorded in order to use it as a regular removable media (LFS file system).
To close a disc session, you need to open your computer, right-click on the CD/DVD drive and select “End Session.” After this, the session will close and the burned disc can be used on other computers.

Once you understand how to write files to disk on this system, you can now use the standard procedure for erasing disks.
How to erase a disk in Windows 7
You can erase information from a disk if the disk is multi-session. Let me remind you that multisession discs are marked RW. If the disc says R, it means it is disposable.
Insert your disk into the drive, then open it on your computer by clicking Start - Computer. Right-click on an empty space in an open window. A list will appear in front of you, from which you should select “Erase this disk”.  A new window will open. Click "Next".
  Wait a little while the information on the disk is erased. When the process is complete, the “Done” button will appear, click on it. Your disk is clean and you can write information to it again.
How to format (erase) a CD/DVD disk
Open your computer, right-click on the drive, and select “Format” from the context menu.
 The standard cluster size when formatting is 2048 bytes, click the “Start” button. After this, formatting will begin.
I hope you figured out how to burn data to a disc that you can later use on another computer, laptop, or in your car player.
Burning an ISO image:
Recording with Windows Media in Windows 7:
Today I want to tell you how to burn data to a DVD disc. After all, many Windows users encounter a problem when they need to write some data to a DVD disc and do not know how to do it. It is possible to burn a DVD using the built-in Windows tools, but this feature does not work very well. Some of you will ask, what about a flash drive (flash drive) on which you can write files? Yes, you can write to a flash drive, but what if you need to transfer the files to another person? Don't give him a flash drive. Or do you need to make an archive of your data, photos, music and films, but there is sorely not enough space on your hard drive? That's right, regular DVD discs (popularly called “blanks”) will come to the rescue here.
So how do you burn files to a DVD? What free program is best to do this? What are the different DVD formats? We'll talk about this in this article. So, let's go...
- What are the formats?DVDs?
- Installationprograms
- Sign up forDVD disc
- Updating an existingDVD disc
- Deleting data onDVD
What are the formats?DVDdisks?
At the beginning of the article, I will tell you, dear readers of my blog, that in addition to DVDs, there are also compact discs or CDs (CD-R, CD-RW), with a capacity of 700 MB, but since their volume is significantly less than the volume of a DVD disc, they are slowly starting to disappear from sale, we will not consider them in this article.
DVD disc is a digital multi-purpose disc – a storage medium made in the form of a disc. Physically they exist in two sizes: 8 cm and 12 cm.
8 cm DVD discs - the volume on such discs is usually 1.46 GB (DVD-1) on a single-layer disc and 2.66 GB (DVD-2) on a double-layer disc. Due to their small size, such discs are convenient to store in your pocket.
12 cm DVD discs - the capacity on such discs is usually 4.70 GB (DVD-5) on a single-layer disc and 8.54 GB (DVD-9) on a dual-layer disc.
There are also other disc formats (DVD-3, DVD-4, DVD-6, etc.), but due to their low prevalence we will not consider them.
The letter (R) in the name of the disk indicates that the disk is for one-time use, the letter (RW) is rewritable, for repeated use.
In addition to differences in size and capacity, DVD discs also differ in recording format.
There are DVD-R or DVD-RW and DVD+R or DVD+RW formats. They differ in the recording standard and are no different for the average user. Both “plus” and “backing” are perfectly readable on all modern DVD devices. There are “fans” of both “plus” and “minus” tracks. For myself, I chose the “plus” format as a more modern recording format.
Installationprograms"Ashampoo Burning Studio 6 FREE"
It is better to write data to a DVD disc using a disc burning program. But which program should you choose? There are a large number of paid and free programs for burning DVDs, and the most popular among the free ones, I think, is “ Ashampoo Burning Studio 6 FREE».
So, to install the program, go to the official website of the program, in the section “ Downloads», ( www.ashampoo.com/ru/usd/dld/0710/Ashampoo-Burning-Studio-6/ )
(you can click on the picture to enlarge it)
We select the place where to download the program and after downloading, run this file (double-click). A window will appear in which you need to select a language and click “ OK»
Click " I agree, continue»
Ignore the installation of additional software, click “ No thanks" And " Further»
Program " AshampooBurningStudio 6FREE» will begin to install
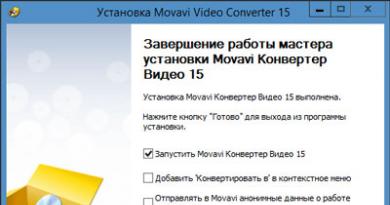
Click " Complete»
Sign up forDVDdisk
Program " AshampooBurningStudio 6FREE"should start automatically. If this does not happen, click on the program icon on the desktop
The main program window will open
To burn files and folders to a blank DVD, click " Burn files and folders", then " Create newCD/DVD/Blue-ray disk»
The BurningStudio program explorer will appear, click the “ Add»
Select with the mouse the files that you want to burn to a DVD disc and click " Add»
The selected files are added to the BurningStudio explorer, where we can perform various actions on them
- List of files prepared for burning to DVD disc
- Disc name
- Control buttons. You can add, delete and rename files
- DVD Disc Full Status
Set the recording speed. I usually set the minimum write speed to increase the chances of it being read on all devices. You can check the box " Check recorded files and folders after recording» to check whether data is read from a DVD after it has been written. Click " OK»
Click " Write downDVD»
We see in a new window that data recording has started on the DVD disc, showing the recording progress
When recording a DVD disc, it is advisable not to run any other programs on the computer, as the recording may stumble and you will ruin the disc.
When the recording is complete, a message will appear indicating that the DVD was successfully burned.
Updating an existingDVDdisk
When recording DVD-RW or DVD+RW discs, sometimes it becomes necessary to add files to the DVD or delete some files. In this case, in the main program window, click on “ Burn files and folders", then " Update existingCD/DVD/Blu-ray disk»
Insert the DVD disc on which you want to update the data into the DVD drive and click " Further»
A program explorer will appear showing the existing files on the DVD. You can rename, delete, add new files. Then click " Further»

Many beginners who still have little knowledge of computer terminology may ask the question exactly this way, or they may ask what to do to write data stored on the computer’s hard drive to a CD or DVD.
I will try to answer in general terms. Why in general terms? Yes, because people write books about CD DVD recording, and I will just tell you a little about recording methods and consider the most common technologies.
How to write data from a computer to disk?
There are several recording methods currently in use.
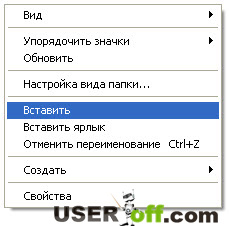
1. Using Windows tools. You need to hover over your folder that you want to burn and right-click, then select “Send”, and then select your drive from the list.

Select files and folders and select send in the context menu
Some people drag files and folders directly onto the drive for recording.
Then move the cursor over the “My Computer” icon and left-click twice. Then move the cursor over the icon of your DVD writer, left-click and select “Burn files to CD.”
You can then follow the instructions and wait for the recording to finish.
2. Paid programs - Clone DVD, Nero.
The Nero program can do almost everything, even what is not really required of it, convert video, trim audio, your own player. The program takes up a lot of space and is paid. If you decide to burn a disc larger than 4GB, then you need to select UDF as the type of disc to be written - otherwise you will receive an error message.
3. If you do not want to buy NERO, then there is no need to despair - there are many free burning programs, for example - Burn4Free - http://www.burn4free.com/ (official website of the program). It is certainly smaller in size and does not include a bunch of add-ons, but it copes with recording CDs and DVDs.
conclusions
There are a lot of recording programs, and many of them are free programs, with the same functions as paid ones.
Using Nero and Burn4Free, I did not resort to alcohol - Alcohol 120%, or a DVD clone.
Everyone can choose for themselves which method of recording CDs, DVDs is most profitable and convenient, try everything.
General points
The writing speed is usually adjusted automatically, so you can choose the maximum if the drive is new, but if the old one also writes poorly, then I recommend lowering it.
If your CD or DVD-RW burner drive disappears or does not read well, it is most likely faulty, think about whether it is worth the trouble, perhaps it has already served its purpose?
Good luck in writing important data to disk.
Sometimes a CD or DVD is used as a medium on which a wide variety of files are stored, that is, its main task is comparable to a flash drive. In such cases, burning is performed according to slightly different standards, naturally, using special software. If you suddenly need to store any objects on disk, we recommend that you familiarize yourself with the methods below in order to study this issue in as much detail as possible.
Next, we want to clearly demonstrate the principle of operation of three programs designed to help the user write any files to disk with a minimum amount of effort. You may notice that the algorithms of action in all software are similar, but attention here should be paid primarily to additional functions that sometimes prove useful to certain users.
Method 1: CDBurnerXP
I would like to start with free software called CDBurnerXP, since such solutions are the most popular due to the absence of various restrictions. However, you should not count on a large number of additional tools. As for the process of writing files itself, this happens as shown in the following guide.
Please note that CDBurnerXP is a simple tool for burning discs with a minimum of settings. If you require a much more expanded package of professional tools, it is better to write information to the drive using Method 2.
- Install the program on your computer, insert the disc into the drive and launch CDBurnerXP.
- The main window will appear on the screen, where select the first item "Data Disk".
- Drag all the required files that you want to write to the drive into the program window or click the button "Add" to open Windows Explorer.
- Immediately above the list of files there will be a small toolbar where you need to make sure that you have selected the desired drive (if you have several of them), and also, if necessary, the required number of copies is marked (if you need to burn 2 or more identical discs).
- If you are using a rewritable disc, such as a CD-RW, and it already contains information, you must first clear it by pressing the button "Erase". If you have an absolutely clean blank, skip this step.
- Now everything is ready for the recording process, now you can press the button to start the process "Record".
- The process will begin and will take several minutes (the time depends on the amount of information being recorded). Once the burning process is complete, CDBurnerXP will notify you and will also automatically open the drive so you can immediately remove the finished disc.
- Use the link above to download and install Nero. After launch, go to the section "Nero Burning ROM".
- When using the trial version, a window will appear asking you to purchase, feel free to close it to get started.
- When creating a new project, it will be enough to specify the mode "Mixed Mode CD" or "Mixed Mode DVD", and then click on "New".
- Start adding files to burn by dragging and dropping them from the built-in browser.
- The storage capacity scale is marked at the bottom. Make sure that all objects fit and that you don’t have to delete anything.
- When finished adding, click on the button "Burn Now" to begin the recording procedure.
- If there are several drives installed in the system, you will need to select the active one and click click on "OK".
- After successfully launching Astroburn Lite, go to the "Files".
- To begin, here indicate the drive into which the required disk is inserted. This is required if multiple drives are connected.
- Then proceed to adding files or directories using the buttons located on the right panel.
- A standard Explorer window will open. Here Select absolutely any files you need.
- Edit them using the available tools if you want to delete or completely clean up the project.
- In the screenshot below you see the inscription "No devices found". In your case there should be a button there "Start Recording". Click on it to start burning.


In addition to files, you can add and create any folders to make it easier to navigate the contents of the drive.


Method 2: Nero
Among all the existing software for burning discs, Nero is rightfully considered the most famous, since the developers have been supporting the functionality of this software for many years, delighting fans with constant updates and improvements. Here you should take into account the fact that the application is distributed for a fee, and the trial version is available for use for a period of two weeks. Then you will have to either abandon the program or buy a license key. Let's put this decision aside for later, because you always need to get to know the basic functionality better first.


The burning process will then begin. Wait for it to finish; this will be indicated by a notification that appears. If you are interested in interacting with Nero and want to continue using this software on an ongoing basis, before purchasing, we recommend that you read a separate article on our website, which explains the main areas of application of this software. This will help you learn all aspects of the tool.
Method 3: Astroburn Lite
Another free software in our article today is called Astroburn Lite and stands out among other solutions in its ease of use. All actions are performed literally in a couple of clicks and look like this:


Wait for the recording to complete and you can immediately begin working with the content.
There are users for whom the above options are not suitable for various reasons. In this case, we advise you to use absolutely any burning program that takes your fancy. Almost all of them allow you to record any files and work on approximately the same principle. Find detailed reviews of popular solutions below.
This concludes our article. From it you learned about methods for burning files onto a CD or DVD. As you can see, there is nothing complicated in interacting with the software, so you can safely download the option you like and complete the task.
Files can be recorded from any computer or laptop that has . Writing data to disk is necessary for storing and transmitting information. CD/DVD drives are external storage devices due to their reliability, durability, high capacity and low cost. Recently, Flash drives or simply Flash Drives have become increasingly popular. But CD/DVD discs are not becoming obsolete and I don’t think they will become obsolete.
We will record files using the built-in tools of Windows 7.
To write files to disk, follow these steps in order.
Step 1 . To begin, insert a blank CD into your CD/DVD drive. If you have it right for removable media, the following window will open Autorun. In the options section for a blank DVD, click on the link. If the autorun window does not appear, then open My Computer and in the section Devices with removable media double click on Disk.

Step 2. A window will appear Burn disc. Here you must indicate Disc name and choose one of two options for using the disk:
- Like a USB flash drive.
- With CD/DVD player.
Select Use as a USB flash drive and click Further.