Create Yandex mail for an organization. Yandex Mail for a domain - creating and setting up a corporate mailbox. Delegation of a domain to Yandex servers
In the Internet. DNS servers, software and hardware systems (applications) ensure the functionality of this condition. Despite the complexity of the name, the process is accessible to a person who does not have programming skills.
Connecting a domain - why is it necessary?
Let’s assume that, for example, domenbk.ru has already been purchased, and there is a desire or need to check mail on other services, such as Yandex. But the question arises: how to use this domain to obtain the following familiar functions:
- Convenience of the application.
- Translation of text from one language to another.
- Familiar interface.
- Calendars and storage.
- Secure storage of information.
- Filtering and spam protection.
The first solution is to set up mail forwarding within the hosting. Mail registered under the domain domenbk.ru will arrive at another address, for example yandex.ru.

The other two options are more complicated. They are appropriate for the following cases:
- Creation of corporate mailboxes (a mailbox of this type is registered for each employee: employee_name@firma.ru).
- For mailings from an existing domain, you need to ensure the delivery of letters that are not defined as spam.
- To create mailboxes for users who are registered on the portal with an identical domain name.
Connecting mail for business: example of Yandex hosting

In order to connect a specific position to mail for the Yandex domain, you can use two solutions:
- By confirming the right to own the domain, after which setting up an MX record will become available. In this case, DKIM and SRV records are not registered automatically.
- Delegation of a domain to Yandex. In this case, the site will become unavailable for up to three days, so this option is suitable for recently installed domains.

How to delegate a domain?
In order to delegate a domain to Yandex, you need the following:
- Registered domain.
- Account in Yandex, which is registered at pdd.yandex.ru.yandex.

- The domain needs to be connected to pdd.yandex.ru.
The domain that is being connected is assigned DNS:
- dns1.yandex.net.
- dns2.yandex.net.

After three days, an A-record with the server’s IP address is indicated in pdd.yandex.ru.
How to attach a domain?
This method is suitable for hosted domains (the site is already located there). To attach a domain you will need:
- Registered domain.
- Yandex account.
- Entering and connecting a domain to pdd.yandex.ru.
- Confirmation of ownership in the following ways: a file is uploaded to the site directory (recommended); a CNAME record is added; by changing the mailbox address at the registrar; delegation (not suitable for repurchased domains).
- Receiving test results.
- Prescribing
- Waiting for the connection to end (takes up to 72 hours).
- Checking the domain status (indicates information about the successful completion of the connection and domain delegation).

Points to remember
- When delegating, the site will be blocked for 72 hours, so this method is best used for new domains.
- Attaching MX records activates the DNS editor, but changing the editor does not apply.
- The availability of Yandex functions in mail will become possible after attachment. It is worth noting that three positions constitute an exception and are limited - these are “Yandex.Money”, “Yandex.Direct”, “Yandex.Music”.
- Mailings within corporate mail are allowed.
Removing a domain from delegation
Hosting has the right to remove one or another domain from delegation. This procedure ignores the specified DNS servers. If a domain is removed from delegation, then access to it is impossible. Both the owners and the registrar can initiate withdrawals.

The reason that affects domain redelegation may be the fact that the initiator of the removal - the owner - independently sets the UNDELEGATED status for sites and services that need to be disabled.
If the initiator is the registrar, then the withdrawal occurs as a result of the following reasons:
- When the registration period has expired, it is blocked for the period specified in the registrar’s rules and upon its expiration is deleted from the register);
- detection of a virus that replaces content, resulting in a phishing page;
- data confirming the right to own the domain has not been provided;
- DNS servers are not working correctly;
- court decision to cancel registration.
The reasons for redelegation are clarified when contacting the registrar's technical support, if the hosting rules established by the registrar are not violated.
Finally, it is worth mentioning that the user can independently check the domain delegation. There are services on the Internet that will help you find out this information. They are easy to work with and the procedure only takes two minutes. The user needs to enter the domain name in the appropriate line and click the “Check” button.
Compared to Mail for a domain, Yandex.Connect provides more options for managing domains and user mailboxes. Migration to Connect occurs automatically; you don’t need to do anything for it. The changes will affect only administrator tools; the migration will not affect the operation of mailboxes in any way.
Migrate to Connect
To transfer your domain and mailboxes from Mail for a Domain to Connect:
Wait for a message that your data has been successfully transferred to Connect. This usually takes a few minutes.
Limitation. The Mail administrator account for a domain is not suitable for working with Connect services. To be able to use Connect services, create an employee account for yourself. If necessary, give it administrator rights.
Differences between Yandex.Connect and Mail for a domain
When migrating from Mail for a domain to Yandex.Connect, the following changes occur:
Automatically created teams do not have administrators. Only an organization administrator in Connect can assign an administrator for such a team.
The Mail administrator for a domain gets the opportunity to manage the organization’s settings in Connect.
DNS record settings for domains delegated to Yandex are now available on the page.
Note. If several domains (except) are connected to Mail for a domain, separate organizations will be created for them.
Other differences are shown in the table:
| Connect | Mail for Domain | |
|---|---|---|
| + | + | |
| 1000 | 1000 | |
| DNS hosting | + | + |
| Aliases for domains | + | + |
| + | − | |
| Aliases for mailboxes | + | + |
| Public API | + | + |
| Company structure support | + | − |
| + | + | |
| + | + | |
| Mailings within a domain | + | + |
| Not limited | 1 | |
| + | − | |
| + | − | |
| Employee Profiles | + | − |
| 10 GB | 10 GB | |
| Corporate messenger | + | − |
| for the company knowledge base | + | − |
| Connect | Mail for Domain | |
|---|---|---|
| Unlimited mailbox capacity | + | + |
| Maximum number of mailboxes | 1000 | 1000 |
| DNS hosting | + | + |
| Aliases for domains | + | + |
| Free third level domain | + | − |
| Aliases for mailboxes | + | + |
| Public API | + | + |
| Company structure support | + | − |
| + | + | |
| Protection against spam and viruses in mail | + | + |
| Mailings within a domain | + | + |
| Number of domain administrators | Not limited | 1 |
| Single signature for mailboxes on a domain | + | − |
| General employee address book | + | − |
| Employee Profiles | + | − |
| Space for each employee | 10 GB | 10 GB |
| Corporate messenger | + | − |
| for the company's knowledge base Yes, you can. After the move, you will not need to configure the API again, and all its capabilities will be preserved. You can see how the Connect API works at. My email domain is connected to Bitrix24. Will moving to Connect affect his work? Work on integration with Bitrix24 is not yet completed. For now, we do not automatically transfer Bitrix24 users to Connect. If you use Bitrix24, do not transfer your domains manually. We will inform you when it becomes possible to connect domains in Yandex.Connect to Bitrix24. I only use Mail and don’t need other services. Can I not move to Connect? Owners of mailboxes on your domain will not notice the changes - the mail interfaces in SDA and Yandex.Connect are almost the same. For domains that we migrate automatically, Connect for Collaboration services are disabled by default. The main changes concern the domain and account management interface. In Connect, the administrator has more options. For example, he could create an employee account system that reflects the company's structure. How to view a list of all mailboxes on a domain? When moving from SDA, mailboxes become employee accounts. You can view the list of employees in the and sections. I see the mailbox all@yourdomain.com in the list. What it is? An address like all@yourdomain.com is your organization’s general mailing list. The newsletter does not have a separate mailbox. Emails sent to the general mailing address will be received by all employees of your organization. How to create a mailbox? Mailboxes in Yandex.Connect are linked to employee accounts. To add a new employee:
|
On almost every hosting you can easily create a mailbox with your domain. But for ordinary users, as well as for website owners, who are mostly entrepreneurs and they simply do not need to delve into the intricacies of setting up connections and configuring mail programs for working with site mail, there is a wonderful service from Yandek -. Those. we will be able to connect our domain to the Yandex mail service and, through their interface, check mail from mailboxes like info@your_site.com. This material is a document that will describe all the steps and manipulations that need to be performed. Let's look at the instructions using the example of connecting the domain of our website - website
Step 1. Yandex mail for a domain - instructions for setting up a yandex account
Yandex mail for the domain is connected on the page

Enter our domain and click the add button.
Our next step will be to verify domain ownership. We are offered three verification methods. We choose the simplest one - uploading a file to the server at the root of the site

do not close the page and move on to the next step
Step2. Mail with your own domain on Yandex - hosting setup
Next step Yandex mail settings for working with your own domain, will be setting up a domain on the hosting (or in the domain registrar panel, in the case when the domain does not host sites).
1. Adding an MX record
First you need to register a Yandex MX record for mail. We look for editing MX records or DNS editor in the control panel.
We need to create a new MX record with the value
and priority
on our hosting it looks like this:

It’s worth noting that on some hosting sites you need to put a period at the end, on others you don’t - when you enter the recipient, if you enter it incorrectly, you should receive a corresponding message.
Also, some panels may contain a site domain name field, usually it is indicated as “@” or in the format “your_domain.com.” (again, pay attention to the presence/absence of a period at the end)
After adding the MX record, we return to the domain rights verification page and go through verification. After verification, you can also create new mailboxes with your domain.

On this, most “advisers” and instructions claim that configured and working, but on some projects my mail didn’t work, so let’s continue and compile a complete guide for setting up Yandex mail for a domain.
2. CNAME record
The next step in setting up Yandex mail for a domain is setting up a CNAME record. To do this, a new CNAME record is created in the hosting control panel in the DNS zone editor with the following values:
- name – “mail” or the full entry “mail.your_site.com” (depends on the syntax supported by the hosting control panel);
- meaning - "domain.mail.yandex.net." (the meaning is the same - you don’t need to change “domain” to the name of your site);
In my cPanel it looks something like this:

3. SPF entry
In the same DNS zone editor, we delete all TXT records. And we add a new one.
- type – TXT;
- value – “v=spf1 redirect=_spf.yandex.net”;
- name – “@” or domain “your_domain.com.”

4. DKIM signature
Added in the same DNS editor, look at the data on the page https://pdd.yandex.ru/domain/your_domain.com/ in the lower right corner

In the DNS editor, add a new entry:
- type – TXT;
- name – “mail._domainkey” or “mail._domainkey.your_domain.com”;
- In the data field we copy the entire contents of the digital signature field.

All the manipulations carried out are complete instructions for setting up a domain for working with Yandex mail.
Be sure to check the operation of the mailbox by sending test letters from and to it. Also, the box should not start working right away - this happens from several hours to several days. This is due to the fact that changes regarding DNS changes come into force during this period
And put corporate mail on it. But it has its own interface and its own fans. Many people like mail from Yandex, so you shouldn’t bypass it. And when organizing corporate mail, you can think about which one is best to do. Maybe someone will want to use a separate script.
Today I want to tell you about how to set up mail from Yandex on your domain.
Yandex.Mail for domain is a free solution from Yandex.
Key Features Yandex.Mail service:
- 1000 email accounts (more is possible)
- no restrictions on mailbox size
- you can upload your logo for the mail web interface
Of course, these are not all the features of the service. Yandex.Mail for domain. Basically, the service is identical to the Yandex.Mail service and has the same features.
Domain connection
In order to learn more about the service and evaluate its advantages, you need to go to the following address: http://pdd.yandex.ru. The same address is needed to start working with the service. Yandex.Mail for domain.
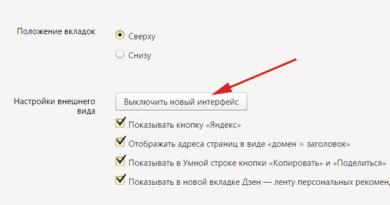
If you are authorized in Yandex, then you will need to click on the link "Connect domain", or you can go to http://pdd.yandex.ru/domains_add/. If you are not authorized, then by visiting the first link, you will be automatically redirected to the domain connection page.
There is a signature field here "Enter the domain name for your email." Where you actually need to enter the name of your domain. And a sign «@»
tells you that your mailboxes will look like yourname@yourdomain.ru(from this link you should enter yourdomain.ru). After you have entered your domain, you need to click on the button "Connect domain".

After you click on the button, the following window will open in which you will need to confirm domain ownership and enter additional settings.
Yandex delegation and DNS hosting
Also, in this window you can delegate some of the rights to Yandex to manage the domain. To do this, you will need to change the NS server of your domain. To do this, you need to contact your domain registrar or hosting provider. It often happens that you do not have access to settings for changing this particular data. Therefore, ask the registrar to change your NS servers to Yandex NS servers:
Primary DNS server: dns1.yandex.net
Secondary DNS server: dns2.yandex.net
Exactly in the form in which Yandex offers them to us.
Of course, this procedure is not at all necessary. But if you do this you will get convenient DNS editor and you don’t have to add separate settings for the domain. Because when delegating, all the settings of DNS records necessary for the full operation of Mail and Jabber from Yandex on your domain will be made automatically. And Yandex and its servers will be responsible for the performance of your domain. The rest of the information can be obtained from the corresponding Yandex help.
Domain delegation is the transfer of part of the rights over a domain zone to another party.

The domain delegation process may take some time.
Step 1: Verify domain ownership
In the first step to connect a domain, you need to confirm domain management rights. And there are several ways:
- Upload a file with a special name and code to the root directory of your site
- For the subdomain on which you mean to use Yandex.Mail, you need to change the CNAME record to mail.yandex.ru
- Specify the email address offered by Yandex as a contact email address for your domain. This can be done through your domain name registrar.
The simplest one, in my opinion, is to create a recommended file with special text.
To do this, you need to go to the site control panel, or if you have access via FTP, you can use or and upload the file offered by Yandex to the root of the site. After you download it? It is advisable to check its presence on the hosting in the root of the site by simply following the link http://yourdomain.ru/filename.html (yourdomain.ru is the name of your domain, filename.html is the file name suggested by Yandex).
Just below the first STEP there is information about whether these actions have been completed or not. Yandex will automatically log into your domain at the specified time and check whether you have done at least one of the methods to confirm domain management rights.
The next inscription just tells you when Yandex will come to you for verification.
Next check will be: 06/28/2013 08:45
After about this time, you can update and check if STEP 1 was completed.

If STEP 1 has been completed, it will become crossed out and this will mean that you have confirmed the rights to the domain, and now you can proceed further.
Step 2. Set up MX records
After rights to manage the domain have been confirmed, you need to make changes to the MX records. If you did the delegation procedure, then you can skip this step.
In order to enter the appropriate MX records, you need to go to your hosting panel and there find something like “DNS Configuration” or “DNS Editor”. And in this section, delete all inline MX records and inline CNAME records, A records. In my editor, one entry “Built in TXT records” was also deleted.
After these steps, you need to create a new MX record that looks like this:
Subdomain name - @
Record type - MX
Data - mx.yandex.ru.
Priority - 10
If you want to access your mail through your subdomain (mail.yourdomain.ru), then you need to add a CNAME record with the following settings:
Subdomain name: mail
Record type: CNAME
Data: domain.mail.yandex.net.
Moreover, “domain” is here Not needs to be replaced with something else. It is what it is and needs to be entered.
While you are waiting to add MX records, you can already add the mailboxes you need by simply entering your login and password. Login is what will appear before the “ @
» in your mailboxes. For example, in the address yourname@yourdomain.ru, yourname is the login.
When delegating a domain, be prepared for the fact that your domain may be down for several hours to several days. This is due to the fact that DNS records must be updated on many third-party resources.
After the MX records have been confirmed, a window for managing your mail will open, and here you can:
- to add a mail box
- Set up domain
- Launch DNS Editor

To add a mail box:

Everything is simple here, you can add your mailbox, and here you need to enter your login and password, the latter twice.
Set up domain:

Here you can choose Default address(letters from mailboxes that do not exist in this domain will be sent to the specified address), Add alias, Turn on, turn off Chat for domain, Turn on, turn off General list of contacts.
DNS Editor

A DNS record editor is provided here. During my work, I had a problem with site accessibility, so I had to enter all A-records manually. Perhaps you won't have such a problem.
Let me remind you once again that the process of distributing DNS settings does not happen immediately, and may take some time - from several hours to two to three days. And if you didn’t encounter any errors during setup, then accept my congratulations!) If someone in your company uses email clients, then the Yandex.Mail service does not exclude this possibility. I checked the functionality of the mail on . Everything works perfectly.
Good luck and enjoy your work with mail using Yandex.Mail service for a domain.
is a free service from Yandex, with which you can create an email based on your domain. At the same time, you will have access to all the capabilities of regular Yandex.Mail (type xxx@yandex.ru). If you have a domain name “mydomain.ru”, you can connect it to Yandex.Mail and create the required number of mailboxes based on this domain of the form xxx@mydomain.ru.
Share your opinion
Hello! We are the help team and want to make articles better!
If the article helped, click Yes.. If it doesn’t help, click No and tell us how we can improve the article.
Thank you! Enjoy reading.
How to connect Yandex.Mail?
note
For Cyrillic domains, you cannot activate the Yandex.Mail service.

Ready! To further configure and work with the service, you will need an account in Yandex.
- If you do not have an account in the Yandex system, create one on the registration page.
- If you have forgotten your login, contact Yandex technical support.
How to confirm domain ownership and set up Yandex.Mail

If the domain is specified ns1.site And ns2.site, copy the TXT record value and paste it into the domain zone according to the instructions: . Then return to the Yandex admin panel and click Run scan. After this, the setup will complete automatically within 15-20 minutes.
If you see a message that says you need to add MX records, check to see if the domain resource records have an entry mx.yandex.net. with priority 10.
If the entry is missing, add it according to the instructions: . Then wait 15-20 minutes. If Yandex.Connect still displays an error, contact Yandex technical support.
If the domain is specified ns1.hosting.site And ns2.hosting.site, further configuration takes place in the hosting control panel.
Delete the specified MX, TXT and CNAME records according to the instructions: .

Then add the following resource records:
| Entry name | Record type | Record value | A priority |
|---|---|---|---|
| mysite.ru. | MX | mx.yandex.net. | 10 |
| mysite.ru. | TXT | v=spf1 a mx include:_spf.hosting..yandex.net ~all | |
| mail.mysite.ru. | CNAME | domain.mail.yandex.net. |
Save the changes and wait 15-20 minutes for the resource records to update.
If DNS servers are registered for your domain ns5.hosting.site And ns6.hosting.site, to configure Yandex.Mail, delete and add the above resource records according to the instructions:
Wait 15-20 minutes for resource records to update.
If DNS servers other than those listed above are registered for your domain, go to the domain zone editor (the site where your domain is served) and add resource records for Yandex.Mail to work.
To find out which records need to be added, go to the list of services, click on the name of the service “Yandex.Mail for a domain” and select “Information about manually setting up the service”.
Important: If you recently changed the DNS servers and then registered resource records, Yandex will not be able to see them immediately, but when the DNS servers are updated.
If you have any additional questions about setting up Yandex.Mail, please contact.
Ready! After the resource records are updated, Yandex.Mail will be ready for use. Further settings are described in the article.
The mail works, use the information below: .
Removing email domains
Skip this step if before Yandex. If you used, delete the local mail domain to avoid a conflict between Yandex.Mail and hosting mail.
How to check if Yandex.Mail is configured correctly?
Write down the required resource records. They can be found at the link “Information about manual server configuration”. Instructions for adding are given above. Information about entries will be updated within 15-20 minutes.
Yandex.Mail service is inactive
Please note that the service status does not affect the operation of the Yandex.Mail service. If in the list of services your service is displayed as inactive for a long time, and the Yandex page indicates that the domain is connected, write, our specialists will establish the correct status.
What to do when an error occurs: there are no MX records for this domain?
This error means that MX records for the domain are not registered. In order for your mail to be processed by the Yandex server, you need to add an MX record pointing to it:
| Entry name | Record type | Record value | A priority |
| mysite.ru. | MX | mx.yandex.net. | 10 |
How to set up DKIM for Yandex.Mail?
Using the specified method, all letters sent from mailboxes will be signed using DKIM. Messages sent using php mail from the site will not be signed with DKIM. If you want emails from the site to also be signed with DKIM, configure mail sending via SMTP in the site settings.

How to disable Yandex.Mail in your Personal Account?
Before disabling Yandex.Mail in your Personal Account, delete mailboxes created for the domain to which the service was connected. Removal is carried out on the Yandex website.
To disable Yandex.Mail in your Personal Account, in the section. go to the Yandex.Mail service management page and click Delete service. Confirm disabling Yandex.Mail. After this, the service in your Personal Account will be disabled.